I decided to completely remove the flashing lights on the front of the bus. Some have suggested keeping them as white "off road" lights, but in Massachusetts, I would have had to cover them with opaque covers on the freeway, and I didn't want to, make it bother you.
I cut out some panels on the side of the old tower case 486 PC. In this particular case, it was a Novell file server 2.2. I remember, how I was delighted with the 64-megabyte DIMM memory, in which I built it. 32 Meg on every stick! Wow! It also had two hard drives 2 Gig!
Driver and navigator seats:
The standard bus seat just wasn't going to cut it. A few years ago a friend gave me an Audi driver's seat 5000, which he threw out. I put it in my Olds minivan with 1990 year, and because the minivan donated the rest of its seats to the campervan design, I chose to install a leather 8-way electric seat in the driver's position. It is also heated, if I can figure out the wiring.
The navigator's seat will be mounted in the upper part of the wheel arch on a plywood platform 3/4 “. To make the fixings as safe and solid as possible, i worked these 1 1/4” aluminum spacers for mounting the seat. They are drilled for fittings 3/8 “, and one face is cut at right angles to the top face of the wheel arch.
Here are the navigators in place, in the staircase there will be a low wall and some folding table. Memory and Map Lighting. The seat is mounted with hardened bolts 3/8 “class 5 with crimp nuts, and there are two angle pieces in the wheel well 1 1/2”, to strengthen the mount.
There was some space in front of the wheel under the navigator's feet, which I could not waste, so i made a face frame and put it in that drawer.
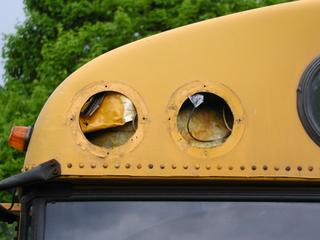
Windows:
Four or five of my windows had the same problem, part of the aluminum rail was broken like this, that the window did not latch fully closed. Self-drilling screw in a steel rib, just like that, he fixed it.
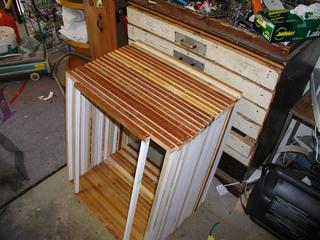
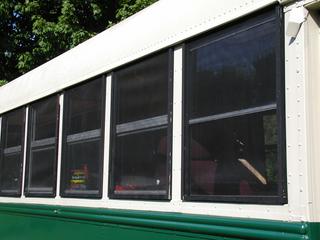
screens:
I came up with a couple of different ideas for quick and easy screens, but finally I found it, that individual framed screens would be the best option. The construction of my bus is like this, that each window is recessed into the frame and has an edge at the top, look at the right picture above, to see what I mean. A simple square frame slides into this slot, and then rests nicely on the windowsill.
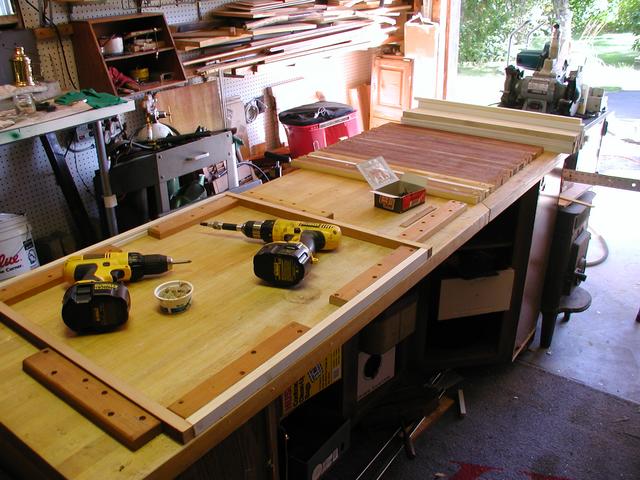
I set up the production line for assembly 20 screens needed to cover all supported windows. Having two cordless drills was really handy.
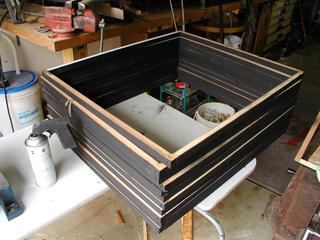
Here are twenty frames completed. I glued the corners with polyurethane construction adhesive, and then secured them with one drywall screw 1 5/8 “in a pre-drilled recessed hole. I sprayed the frames with flat black spray cans. If I knew, that it will take 8 down, which I would light the painter Wagner Power.
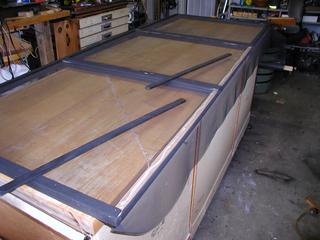
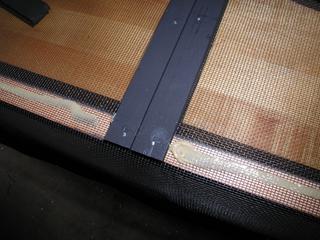
Then I stacked three frames at a time and covered them with fiberglass material. After laying the construction adhesive layer, I nailed it 1/4 “pine strips on the edge. I used my Arrow stapler, which also accepts 9/16 sticks”.
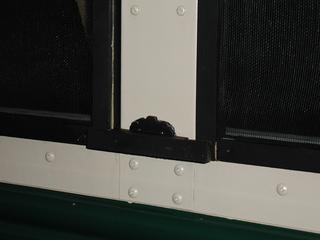
These are the screens on the bus, I think, that black was the right color for the frames. Some windows fit better than others. So that all screens are tight, I did 20 such brackets with the help of magnets from the hard drives of old computers, they are very strong, i think, that I could drive the highway without fear, that I will lose my screens, but plans to hide them on the way .
Bus with all screens in place (but without the magnetic brackets in this photo).
Here is a picture of automatic tire chains – I can not wait, to try out these little ones this winter!
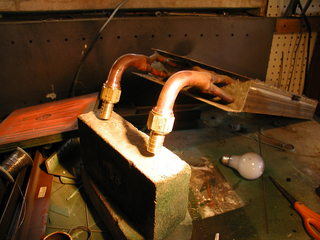
I wanted to move the radiator in the bathroom area from the floor to the corridor wall. However, I couldn't find the heater hose anywhere 1 “. Eventually I bought a couple of 3/4 hose nozzles” for female connectors 3/4 “NPT, which I drilled with a drill 1” and soldered to the heater core.
Here is the reassembled heater core. The fan motors were stuck and needed lubrication. Unfortunately, the rear bearings were sealed, so I had to drill a little hole in the motor housing, to pump in some oil.
Here is the radiator mounted under the bathroom sink.
There was a limiter plug in one of the hoses, to force more hot water on the controller, but I wanted to be able to regulate the distribution, so I installed a latch instead.
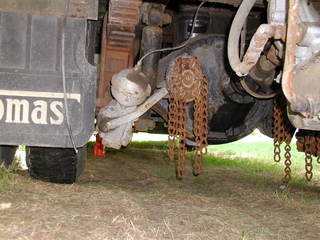
Towbar:
I have installed the receiver 2 “on the rear bumper and the bumper bracket.
I wanted a hook, so that I can mount accessories such as a rear porch or a bicycle rack, and also to tow a car.
This is a "step bumper" receiver designed to be mounted under the step bumper on a pickup. I've seen the ones advertised for only 30-40 USD.
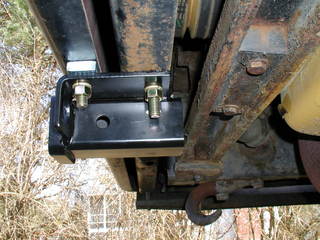
The spacers attached to the receiver turned out to be just the right height, to mount the receiver on my rear bumper and bumper bracket.
The bumper is made of steel 1/4 “, and the bracket is 5/16” and serves as the extreme rear cross member of the frame.
I think, that they are so rebuilt, because the engine is so close to the rear of the vehicle. It's a crank pulley, you can see above the back of the receiver.
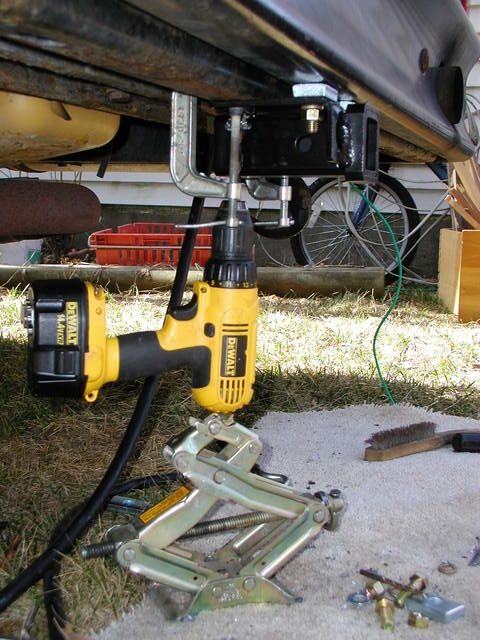
To mount the receiver, I just clamped it in the right place and used my method “upside down drills”, to drill holes.
 I decided to completely remove the flashing lights on the front of the bus. Some have suggested keeping them as white "off road" lights, but in Massachusetts, I would have had to cover them with opaque covers on the freeway, and I didn't want to, make it bother you.
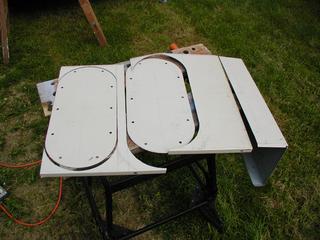 I cut out some panels on the side of the old tower case 486 PC. In this particular case, it was a Novell file server 2.2. I remember, how I was delighted with the 64-megabyte DIMM memory, in which I built it. 32 Meg on every stick! Wow! It also had two hard drives 2 Gig!
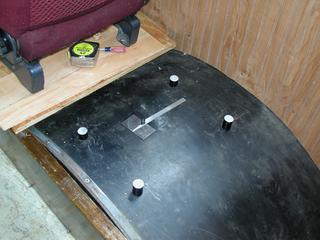 The navigator's seat will be mounted in the upper part of the wheel arch on a plywood platform 3/4 “. To make the fixings as safe and solid as possible, i worked these 1 1/4” aluminum spacers for mounting the seat. They are drilled for fittings 3/8 “, and one face is cut at right angles to the top face of the wheel arch.
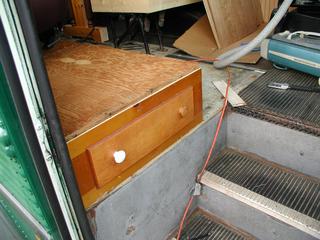 There was some space in front of the wheel under the navigator's feet, which I could not waste, so i made a face frame and put it in that drawer.
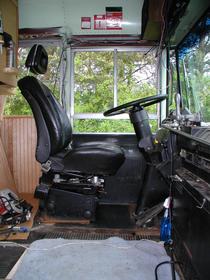 The standard bus seat just wasn't going to cut it. A few years ago a friend gave me an Audi driver's seat 5000, which he threw out. I put it in my Olds minivan with 1990 year, and because the minivan donated the rest of its seats to the campervan design, I chose to install a leather 8-way electric seat in the driver's position. It is also heated, if I can figure out the wiring.
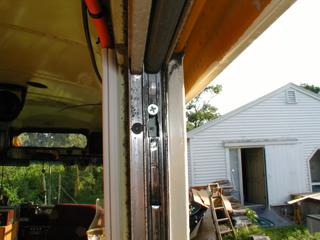
 I wanted to move the radiator in the bathroom area from the floor to the corridor wall. However, I couldn't find the heater hose anywhere 1 “. Eventually I bought a couple of 3/4 hose nozzles” for female connectors 3/4 “NPT, which I drilled with a drill 1” and soldered to the heater core.
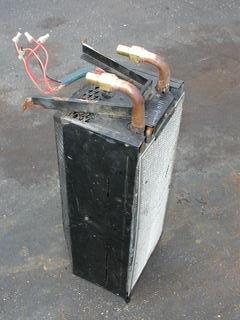 Here is the reassembled heater core. The fan motors were stuck and needed lubrication. Unfortunately, the rear bearings were sealed, so I had to drill a little hole in the motor housing, to pump in some oil.
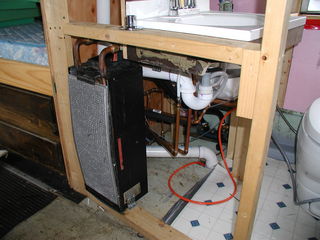 Here is the radiator mounted under the bathroom sink.
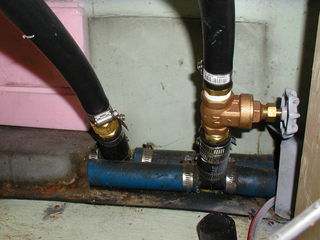 There was a limiter plug in one of the hoses, to force more hot water on the controller, but I wanted to be able to regulate the distribution, so I installed a latch instead.
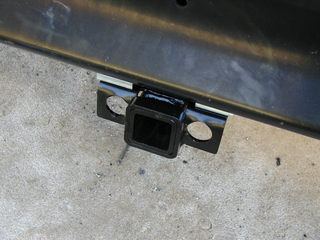 I have installed the receiver 2 “on the rear bumper and the bumper bracket.
 The spacers attached to the receiver turned out to be just the right height, to mount the receiver on my rear bumper and bumper bracket.


- American")


 - Australian")

 - Austrian")
 - Italian")