Water and sewage installation in a motorhome – on the bus:
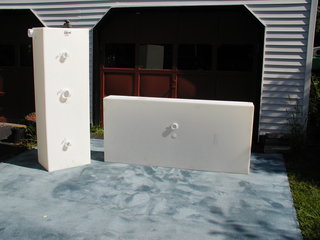
These are two tanks, which I ordered in Plastic-Mart.com .
Seller "Tank" (so, really!) He was very helpful and supplied and installed the weld fittings free of charge. The tank on the left in the black and gray tank and the one on the right is the drinking water tank. The couplings on the BG tank are slip-on, and the water tank fittings are threaded. I'm not sure, what is normally used, but these options work so far.
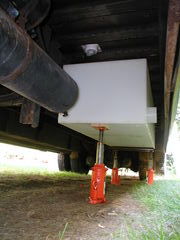
Here is the BG tank plugged into place under the bus. It's a bit tight at the dump outlet, but everything should fit. I will cut out the apron and install the frame for the dump valve door and the 2 inch apron extension, which will fit the profile of the magazine under the recess on the other side of the bus.
Here is a summary of the support frame for the BG tank. It is made of an angle bar 1 1/4 “from old bed frames. Welds well with an oxy-acetylene torch, but it is difficult to drill – use low speed and cutting oil, and then drill the parts on the drill, instead of trying to use a hand drill.
Attaching the frame to the tank. I had to trim the area under the drain valve with an angle grinder and a cutting disc. This material is very hard on any kind of saw, I used a strong miter box and an abrasive cutting disc to cut all the material.
Here is the complete assembled frame. I used screws 3/8 “, nuts and locks. The frame is painted in glossy black Rustoleum protective enamel. I put 1/2 sheet” the hardened layer, to protect the bottom of the tank from road debris and give it some extra support.
I cut slits around the edges of the plywood, to provide some drainage, so that water cannot collect inside the angle section on the edge of the plywood.
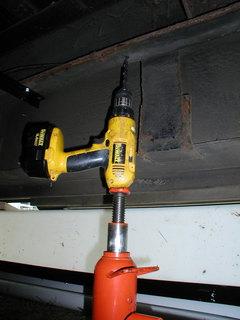
I didn't want to drill into the floor, to suspend the tank, so I did some of these 9 inch episodes, which attach the top rail to the underside of the floor. There is them 16, so everyone will only have to wear 50 LB when the tank is full. That's what I call Blackwater Security! [Rimshot] 😉
Here is the frame ready to receive the tank. You can see a piece of black iron gas pipe for water heater at the top of the frame.
The tank is ready for use. All the fillings at the top are tucked in, so the tank should be easily removable if necessary.
Tank in place. The floor turns out to be inclined by approx 1/4 “outside, which somewhat rejected my geometry. Part of the screw head is pressed a little bit into the sides of the tank, so i will make some washers, to prevent damage to the tank over time.
Black and gray tanks hang exactly to the same level, what the bottom of the hold on the other side.
Side view, the two left-hand bits protruding from under the tank are the fuel tank bracket, are the lowest points between the axes.
This is the opening for the toilet flange, I first cut this hole and used it as a benchmark for all my subsequent measurements.
The flange screws into the adapter, which is glued to a short section of pipe in diameter 3 cali. I bought the camper collar at O'Connor's Hardware (it's just a hardware store, not a place for motorhomes, but they have half of the RV island. check it out , it's not just a hardware store, it's the best goddamn hardware store in the Boston metropolitan area.) The remaining elements of the equipment are standard PVC materials.
I drilled this hole with a hole saw 2 1/4 “on the basis of a fax, which I sent to Plastic Mart to determine the location of the fittings. Sometimes it is enough to use the Force.
Unfortunately 2 1/4 ‘wasn’t big enough for a tee, which must have protruded through the floor, so I had to cut a bigger hole with a saw.
The drain to the sink has an exit, coming out from under the floor channel, then up and over the bus frame.
The entire length of the frame. You can see a bundle of air hoses to the brakes, throttle, air tanks etc., Which run up the middle of the bus.
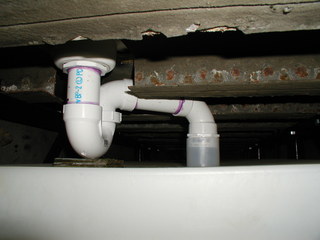
It seemed, that this is the best place to set a sink trap. Should have let me easily drain this whole run, when it's time for wintering,
And across the floor to the kitchen sink.
This is a shower trap, I went down to the pipe 1 1/4 “, because trap 2” it just wouldn't fit between the tank and the floor.
I had to warm the vent tube with a propane burner and bend it slightly, so that it is parallel to the place, in which she passed through the roof.
Here is a small plastic vent plug, which covers the end of the vent pipe. I also used a large amount of silicone gasket around the pipe.
I use a Makita angle saw to cut the square, 10-inch metal cutting discs are available from Home Depot and will last for approx 100 cuts.
Most beds have a frame made of an angle bar 1 1/4 “. This material is quite hard and stiff, eats a hacksaw blade for lunch, so the best way to cut is with an abrasive wheel.
I used the same method, to build the frame of the drinking water tank, I made for the black water tank. However, because this tank will be mounted directly to the bottom of the rails of the frame, decided to mount it with a threaded rod.
Looks like it, that there is a constant supply of these frames, I come home with at least one trip to the municipal landfill.
This arrangement made drilling in the rails of the frame much easier. Be careful, on my bus the fuel line was in the frame rail and i hardly saw it, until it was too late.
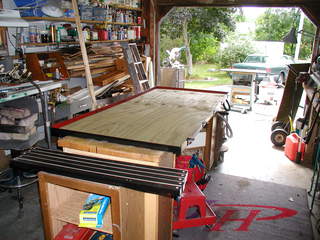
The crossbars were screwed together with wooden spacer bars, on which the upper part of the tank will rest.
The hoses are attached before the tank is raised into place. I had them install a single coupler 2 “NPT at the top of the tank, I should have installed the coupler 1 1/2” i 1/2 “for fill pipe and breather. I had to make my own ventilation system with a barbed fitting 1/2 “attached to the top of the elbow 2”.
Here is the tank in place.
Another view showing both tanks.
Fill door assembly with fill hose and vent tube.
I paid too much for this piece of plastic, I should have fabricated something, I think I'm getting lazy.
I made a door for a drain valve, the first step is to cut an apron around the discharge nipple.
More bed frame angle is used.
Spawam to.
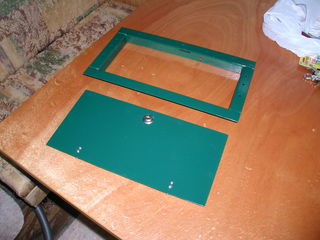
Door installation.
The door is another piece of the computer case, a key lock has been purchased. Two pins, which you see, are book shelf brackets.
Everything painted.
Once installed, there will be more stainless steel screws and an apron in front of and behind the door.
Here is the complete assembly.
I used a jigsaw to cut the side of the bus for a water heater. I had to climb just above the seat rail. To fill the space between the protective strips, I cut pieces of oak and painted them with XO-Rust paint, to seal them. I also dumped large portions of clear silicone slurry into the top bar, to prevent water ingress.
Here is the water heater installed. Works well and heats up 6 gallons of water in about ten minutes.
Here is the water pump and connectors under the bus. The pump has a built-in check valve, as is the hose connection for the filler door assembly, so nothing special is required to use an external water source. You hear a pump on the bus, but she is very quiet i think, that I actually prefer to hear her work, that way I will know, is there a problem.
I used a standard copper pipe 1/2 “, because I know her well, and after the renovation of the house, there were a few pipes and fittings left. Here's the back of the shower, ran the pipes in the bus, because it was raining all week and I just didn't want to get under the bus in the mud.
Here is the view under the sink. The white box is an Atwood water heater. Originally, I used rigid plastic fittings to connect the radiator, but they started to leak after that, how the water heater has gone through several thermal cycles, so I replaced the plastic fittings with pieces of hose.
The sink comes from a municipal landfill, which still have the manufacturer's stickers “Care and installation”!
 These are two tanks, which I ordered in Plastic-Mart.com .
 Here is the BG tank plugged into place under the bus. It's a bit tight at the dump outlet, but everything should fit. I will cut out the apron and install the frame for the dump valve door and the 2 inch apron extension, which will fit the profile of the magazine under the recess on the other side of the bus.
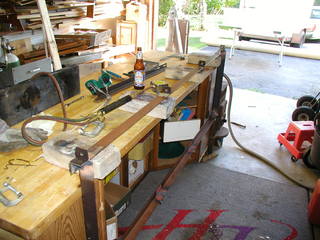 Here is a summary of the support frame for the BG tank. It is made of an angle bar 1 1/4 “from old bed frames. Welds well with an oxy-acetylene torch, but it is difficult to drill – use low speed and cutting oil, and then drill the parts on the drill, instead of trying to use a hand drill.
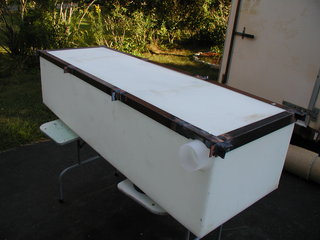 Attaching the frame to the tank. I had to trim the area under the drain valve with an angle grinder and a cutting disc. This material is very hard on any kind of saw, I used a strong miter box and an abrasive cutting disc to cut all the material.
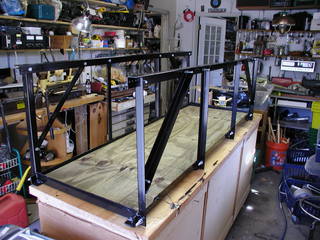 Here is the complete assembled frame. I used screws 3/8 “, nuts and locks. The frame is painted in glossy black Rustoleum protective enamel. I put 1/2 sheet” the hardened layer, to protect the bottom of the tank from road debris and give it some extra support.
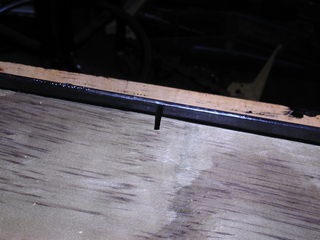 I cut slits around the edges of the plywood, to provide some drainage, so that water cannot collect inside the angle section on the edge of the plywood.
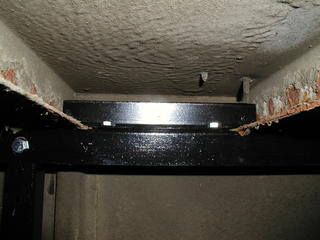 I didn't want to drill into the floor, to suspend the tank, so I did some of these 9 inch episodes, which attach the top rail to the underside of the floor. There is them 16, so everyone will only have to wear 50 LB when the tank is full. That's what I call Blackwater Security! [Rimshot] 😉
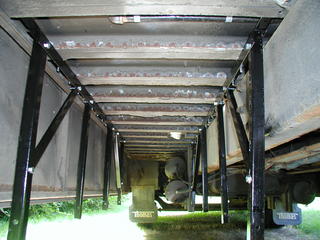 Here is the frame ready to receive the tank. You can see a piece of black iron gas pipe for water heater at the top of the frame.
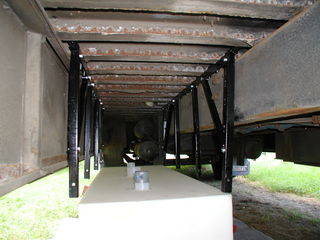 The tank is ready for use. All the fillings at the top are tucked in, so the tank should be easily removable if necessary.
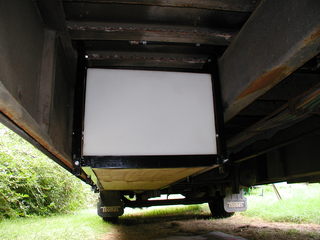 Tank in place. The floor turns out to be inclined by approx 1/4 “outside, which somewhat rejected my geometry. Part of the screw head is pressed a little bit into the sides of the tank, so i will make some washers, to prevent damage to the tank over time.
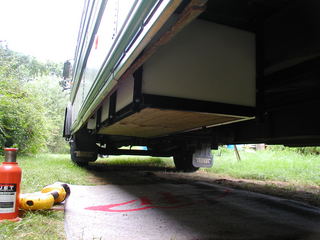 Black and gray tanks hang exactly to the same level, what the bottom of the hold on the other side.
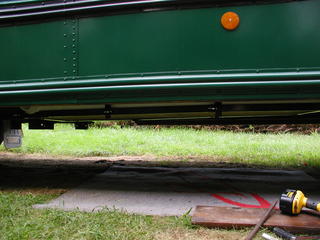 Side view, the two left-hand bits protruding from under the tank are the fuel tank bracket, are the lowest points between the axes.
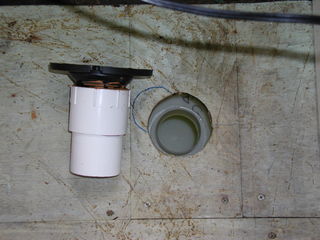 This is the opening for the toilet flange, I first cut this hole and used it as a benchmark for all my subsequent measurements.
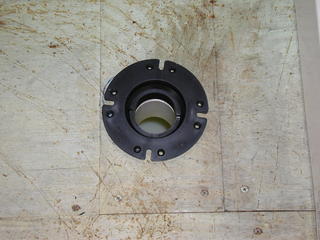 The flange screws into the adapter, which is glued to a short section of pipe in diameter 3 cali. I bought the camper collar at O'Connor's Hardware (it's just a hardware store, not a place for motorhomes, but they have half of the RV island. check it out , it's not just a hardware store, it's the best goddamn hardware store in the Boston metropolitan area.) The remaining elements of the equipment are standard PVC materials.
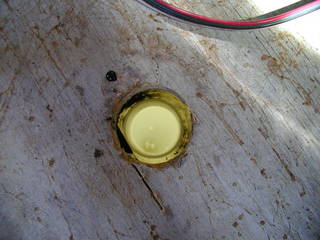 I drilled this hole with a hole saw 2 1/4 “on the basis of a fax, which I sent to Plastic Mart to determine the location of the fittings. Sometimes it is enough to use the Force.
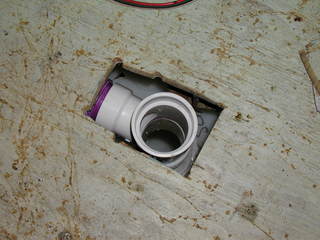 Unfortunately 2 1/4 ‘wasn’t big enough for a tee, which must have protruded through the floor, so I had to cut a bigger hole with a saw.
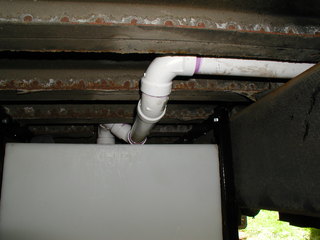 The drain to the sink has an exit, coming out from under the floor channel, then up and over the bus frame.
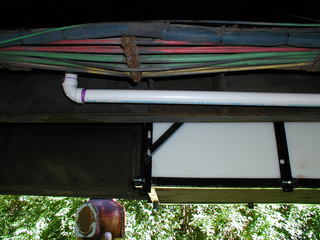 The entire length of the frame. You can see a bundle of air hoses to the brakes, throttle, air tanks etc., Which run up the middle of the bus.
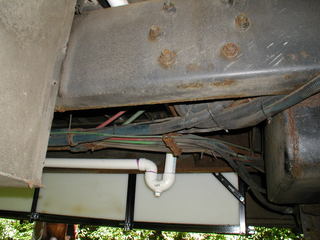 It seemed, that this is the best place to set a sink trap. Should have let me easily drain this whole run, when it's time for wintering,
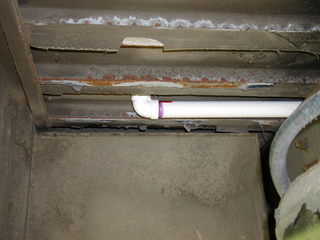 And across the floor to the kitchen sink.
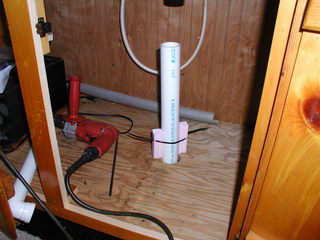
 This is a shower trap, I went down to the pipe 1 1/4 “, because trap 2” it just wouldn't fit between the tank and the floor.
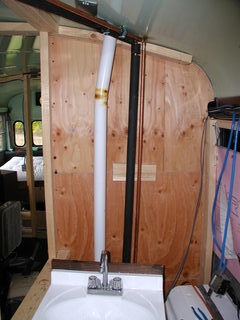 I had to warm the vent tube with a propane burner and bend it slightly, so that it is parallel to the place, in which she passed through the roof.
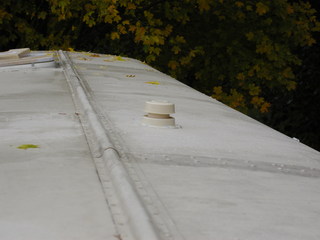 Here is a small plastic vent plug, which covers the end of the vent pipe. I also used a large amount of silicone gasket around the pipe.
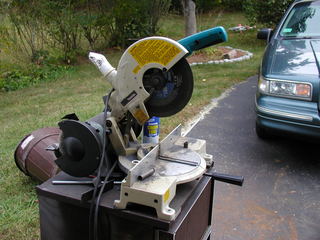 I use a Makita angle saw to cut the square, 10-inch metal cutting discs are available from Home Depot and will last for approx 100 cuts.
 I used the same method, to build the frame of the drinking water tank, I made for the black water tank. However, because this tank will be mounted directly to the bottom of the rails of the frame, decided to mount it with a threaded rod.
 This arrangement made drilling in the rails of the frame much easier. Be careful, on my bus the fuel line was in the frame rail and i hardly saw it, until it was too late.
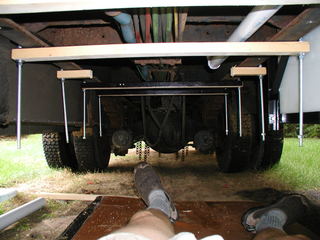 The crossbars were screwed together with wooden spacer bars, on which the upper part of the tank will rest.
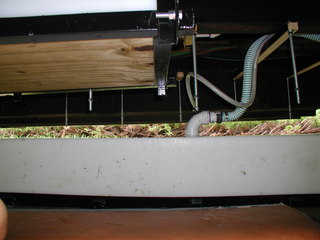 The hoses are attached before the tank is raised into place. I had them install a single coupler 2 “NPT at the top of the tank, I should have installed the coupler 1 1/2” i 1/2 “for fill pipe and breather. I had to make my own ventilation system with a barbed fitting 1/2 “attached to the top of the elbow 2”.
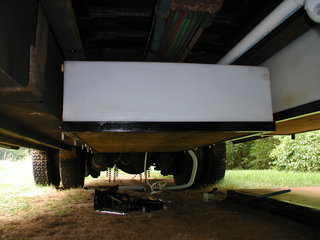 Here is the tank in place.
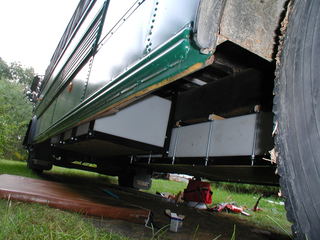 Another view showing both tanks.
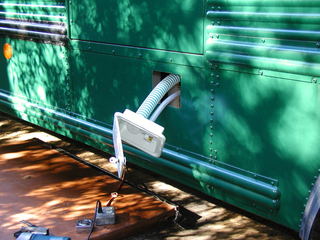 Fill door assembly with fill hose and vent tube.
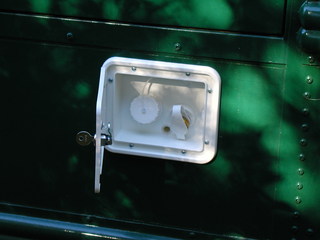 I paid too much for this piece of plastic, I should have fabricated something, I think I'm getting lazy.
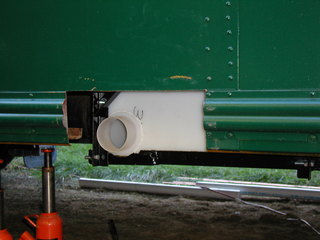 I made a door for a drain valve, the first step is to cut an apron around the discharge nipple.
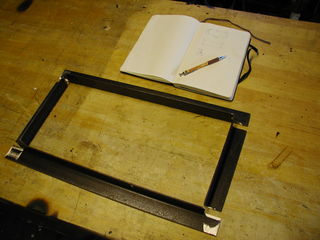 More bed frame angle is used.
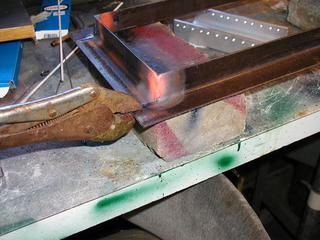 Spawam to.
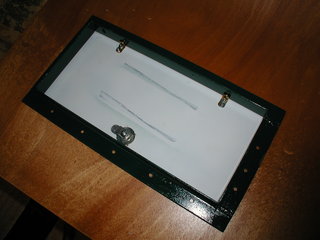 Door installation.
 Everything painted.
 Once installed, there will be more stainless steel screws and an apron in front of and behind the door.
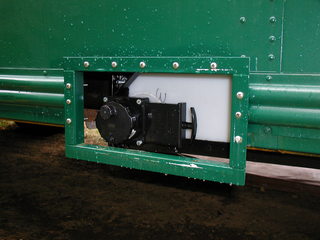 Here is the complete assembly.
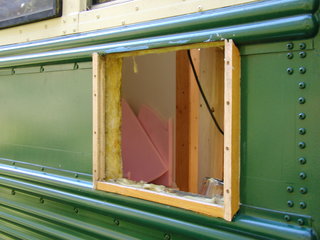 I used a jigsaw to cut the side of the bus for a water heater. I had to climb just above the seat rail. To fill the space between the protective strips, I cut pieces of oak and painted them with XO-Rust paint, to seal them. I also dumped large portions of clear silicone slurry into the top bar, to prevent water ingress.
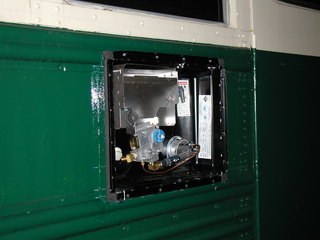 Here is the water heater installed. Works well and heats up 6 gallons of water in about ten minutes.
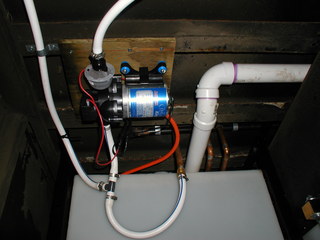 Here is the water pump and connectors under the bus. The pump has a built-in check valve, as is the hose connection for the filler door assembly, so nothing special is required to use an external water source. You hear a pump on the bus, but she is very quiet i think, that I actually prefer to hear her work, that way I will know, is there a problem.
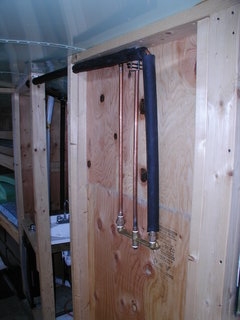 I used a standard copper pipe 1/2 “, because I know her well, and after the renovation of the house, there were a few pipes and fittings left. Here's the back of the shower, ran the pipes in the bus, because it was raining all week and I just didn't want to get under the bus in the mud.
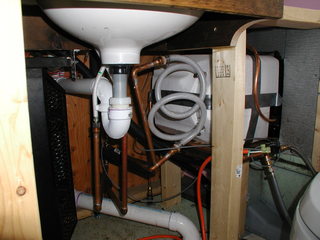 Here is the view under the sink. The white box is an Atwood water heater. Originally, I used rigid plastic fittings to connect the radiator, but they started to leak after that, how the water heater has gone through several thermal cycles, so I replaced the plastic fittings with pieces of hose.


- American")


 - Australian")

 - Austrian")
 - Italian")