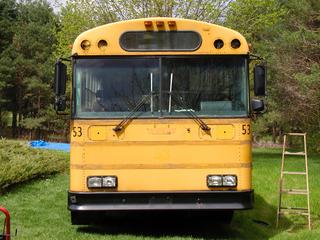
I'm getting ready to paint. I washed the bus under pressure and removed all decorations, reflectors and exterior lights.
This is paint, which I will be using. After a few experiments, I decided, that I will not sand the yellow paint before applying XO-Rust. I'll just clean and wipe the bus with paint thinner.
I figured it out 3 gallons per body and 2 onto the roof, so i bought around 5 gallons and mixed the paint together, to even out any color differences between the cans.
Here are two panels, with green painted wiper motors, I am quite happy with the finish and the way the paint is laid with the brush. Obviously, a vertical surface will be more difficult.
Here are the finished light panels painted in the color XO-Rust Almond. Instead of painting the screw heads, i decided to just buy new stainless steel screws, I think, that they will look better than painted screws and I will be able to remove the panels without spoiling the paint.
Almond paint will also go to the roof, so I mixed it with a ceramic paint additive, which is supposed to significantly reduce heat gain.
Here are my supplies, color, paint thinner, brushes, rollers, wiping clothing, nitrile wiping gloves and latex paint gloves.
It took about five hours to paint the roof. The ceramic additive made it difficult to spread the paint.
The foam roller turned out to be bad. The best tool turned out to be an ordinary short scraper roller. The paint was spread very nicely with a short roller.
Here is the front with green, which turns out to be very close to the Coleman green. The green paint did not contain ceramics and spread very nicely. I painted in the sun (which you really shouldn't be doing), as a result the paint dried a little too quickly, leaving a few bubbles. A careful second layer will take care of everything.
Without the mirrors, the bus looks like one of the old MBTA cars
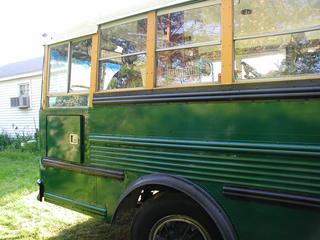
Here is the left side. I decided, that the upper scuff bar will also be green, And the almond color comes down to the top bar. The muntin bars between the window will be almond, not black, which I originally planed.
The finish is a bit bumpy, but it looks nice, I'm happy. The middle protective strip will remain black, but it will be repainted.
Here is the front with the light plates fitted, wiper mounts and headlamp cover, there are no mirrors yet, I have to wipe the rust off and repaint them again.
Here is the right side, Only the yellow on the door remained to be painted, the bus now has one coat of varnish. He will get the second coat in the fall – and maybe next spring.
One coat of paint for everything – the second layer will wait until next year. Bus – the motorhome looks good even up close. I have a little more black to paint, for this I'm going to mask and spray.
The taillights were rusty, I had to completely replace the lower ones and managed to clean the upper and repair some corroded wires. Flashers are currently disconnected, I plan to combine them with four-way lamps. The beauty of standardized production techniques is this, that I could buy both taillights, as well as the spare lights at my local auto parts store for approx 40 USD. Again, I would pay half that for just one lens for my Towncar.
Here is the front with a trim, mirrors and antennas. Found an old CB radio in the city dump and decided to install it on the bus. I put the Firestick fiberglass antenna on 5/8 wave on the right mirror and replaced the standard AM antenna / FM on the left.
 I'm getting ready to paint. I washed the bus under pressure and removed all decorations, reflectors and exterior lights.
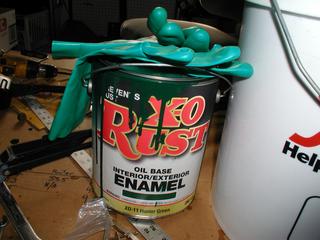 This is paint, which I will be using. After a few experiments, I decided, that I will not sand the yellow paint before applying XO-Rust. I'll just clean and wipe the bus with paint thinner.
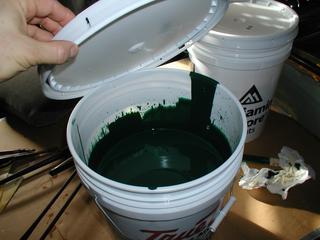 I figured it out 3 gallons per body and 2 onto the roof, so i bought around 5 gallons and mixed the paint together, to even out any color differences between the cans.
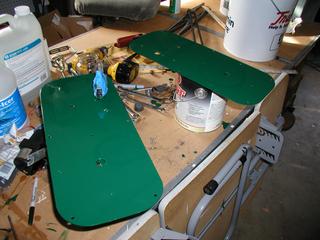 Here are two panels, with green painted wiper motors, I am quite happy with the finish and the way the paint is laid with the brush. Obviously, a vertical surface will be more difficult.
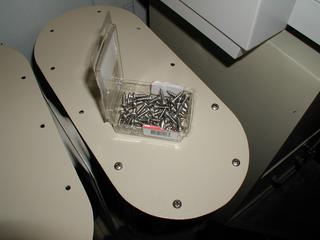 Here are the finished light panels painted in the color XO-Rust Almond. Instead of painting the screw heads, i decided to just buy new stainless steel screws, I think, that they will look better than painted screws and I will be able to remove the panels without spoiling the paint.
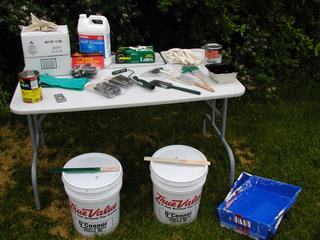 Here are my supplies, color, paint thinner, brushes, rollers, wiping clothing, nitrile wiping gloves and latex paint gloves.
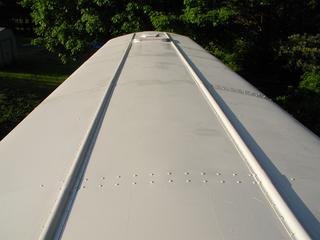 It took about five hours to paint the roof. The ceramic additive made it difficult to spread the paint.
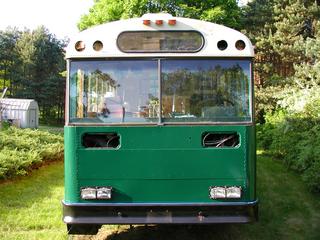 Here is the front with green, which turns out to be very close to the Coleman green. The green paint did not contain ceramics and spread very nicely. I painted in the sun (which you really shouldn't be doing), as a result the paint dried a little too quickly, leaving a few bubbles. A careful second layer will take care of everything.
 Here is the left side. I decided, that the upper scuff bar will also be green, And the almond color comes down to the top bar. The muntin bars between the window will be almond, not black, which I originally planed.
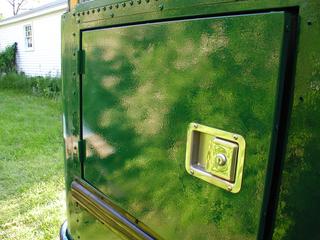 The finish is a bit bumpy, but it looks nice, I'm happy. The middle protective strip will remain black, but it will be repainted.
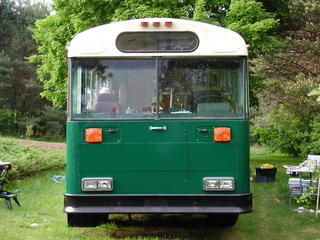 Here is the front with the light plates fitted, wiper mounts and headlamp cover, there are no mirrors yet, I have to wipe the rust off and repaint them again.
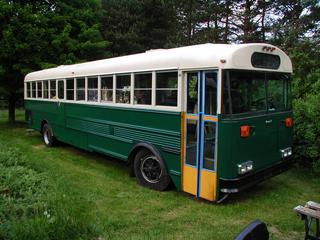 Here is the right side, Only the yellow on the door remained to be painted, the bus now has one coat of varnish. He will get the second coat in the fall – and maybe next spring.
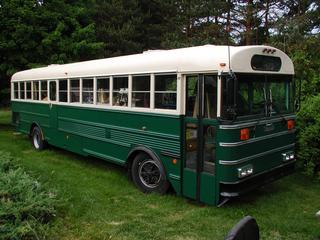 One coat of paint for everything – the second layer will wait until next year. Bus – the motorhome looks good even up close. I have a little more black to paint, for this I'm going to mask and spray.
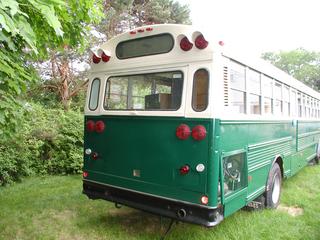 The taillights were rusty, I had to completely replace the lower ones and managed to clean the upper and repair some corroded wires. Flashers are currently disconnected, I plan to combine them with four-way lamps. The beauty of standardized production techniques is this, that I could buy both taillights, as well as the spare lights at my local auto parts store for approx 40 USD. Again, I would pay half that for just one lens for my Towncar.
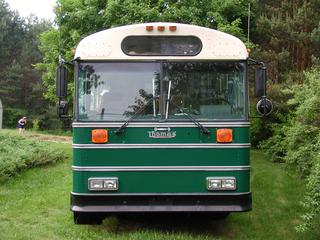 Here is the front with a trim, mirrors and antennas. Found an old CB radio in the city dump and decided to install it on the bus. I put the Firestick fiberglass antenna on 5/8 wave on the right mirror and replaced the standard AM antenna / FM on the left.


- American")


 - Australian")

 - Austrian")
 - Italian")